Removing an image background sounds like a one-click task, but a clean result depends on a few small decisions before and after the upload. A portrait with loose hair, a glass cup, a white product on a light table, and a logo on a busy screenshot all need slightly different treatment. The best workflow is simple: start with a good source image, choose the right subject type, review the edge quality, and export the format that fits the final use.
What a clean background removal result should look like
A clean cutout is not just an object floating on a checkerboard. It should look natural when placed on a real background. The subject edges should be smooth but not blurry, hair should keep enough fine detail, handles and small holes should stay open, and there should be no obvious leftover color halo from the old background.
 Before
 After
After
Portraits need extra attention around hair, shoulders, and skin tones near the background.
Start with the best source image
Most rough cutouts begin with a weak source file. If the original image is blurry, underexposed, heavily compressed, or too small, the background remover has less edge information to work with. Choose the highest-quality original you can find, even if the final image will be smaller. It is usually better to remove the background first, then resize and compress the finished image later.
Before uploading, check these details
- Focus: the subject should be sharp, especially around hair, hands, product corners, or transparent parts.
- Contrast: the subject should not blend into the background. A beige cup on a beige table is harder than a dark object on a light background.
- Full subject: avoid cropped-off edges unless that is the intended final look.
- Lighting: strong shadows and reflections can be mistaken for part of the subject.
- File quality: avoid screenshots of photos when you can use the original image file.
Choose the right image type
Many background removal tools now offer different modes because a product photo is not the same as a portrait. If your tool has image-type options, use them. A general mode is convenient, but a specific mode can preserve details that matter for that subject.
| Image type | Best for | What to inspect |
|---|---|---|
| General | Everyday photos, mixed subjects, simple objects | Overall edge accuracy and missing small parts |
| Product | Online store photos, packaging, cups, bottles, accessories | Handles, holes, reflections, shadows, and product corners |
| Portrait or hair | People, profile photos, hair-heavy images | Hair strands, shoulders, ears, skin edges, glasses |
| Food | Cakes, dishes, drinks, restaurant menu images | Soft edges, plates, garnish, crumbs, steam, shadows |
| Logo or custom | Brand marks, icons, flat artwork, screenshots | Sharp corners, inner gaps, text edges, transparent holes |
Step-by-step: remove a background cleanly
- Open the background remover. Use the FlymeTools Remove Background tool and add your image.
- Select the closest image type. Choose product, portrait, food, sky, hair, skin, clothing, logo, custom, or general depending on the subject.
- Process one image first. For a batch, test one representative image before uploading many files.
- Preview the transparent result. Look at the cutout on a checkerboard and on a light or dark background if your editor supports it.
- Fix the edge if needed. Use erase to remove leftover background and restore to bring back missing parts of the subject.
- Download PNG for transparency. Keep the PNG as your master cutout, then make smaller copies for web pages or listings.
Try it with FlymeTools
Use Remove Background for automatic cutouts, subject-type selection, and edge refinement. After that, you can use Resize Image, Compress Image, or JPG to WebP to prepare final website copies.
Open Remove BackgroundHow to check the result like a designer
Do not only trust the first preview. A cutout can look fine on a checkerboard but show problems when placed on a real design. Zoom in and scan the edge slowly. Then place the image on the background where it will actually be used: white store listing, colored banner, social post, presentation slide, or product comparison table.
Check at 100%
Zooming too far out hides halos, rough hair, and small missing parts.
Try light and dark backgrounds
A pale edge may be invisible on white but obvious on a dark banner.
Look for unnatural shadows
Some shadows should be removed; others help a product feel grounded.
Keep a master PNG
Make web-sized copies from the master instead of editing the same file repeatedly.
Common problems and how to fix them
There is a colored halo around the subject
This often happens when the original background color spills onto the subject edge. Try a subject-specific mode, then use a small erase brush around the halo. If the halo is still visible, place the cutout on a similar color background or use a softer edge treatment in your image editor.
Hair looks blocky or too smooth
Hair is one of the hardest parts of background removal. Use a portrait or hair mode when available, avoid over-compressed source images, and check the result on the final background. A slightly natural edge is often better than an aggressively erased outline.
Transparent or reflective products lose detail
Glass, jewelry, and glossy packaging can confuse automatic tools because highlights and reflections look like background. Use a product mode and inspect holes, handles, and reflective edges carefully. Sometimes you may need to restore small parts manually.
The result file is too large
Transparent PNG files can be larger than JPG because they store alpha transparency. Keep the PNG if transparency is required. If the image will sit on a fixed white or colored background, export a flattened JPG or WebP copy for the website. For more detail, see PNG vs JPG vs WebP explained and how to make images smaller for websites.
Best export format after background removal
| Need | Recommended format | Why |
|---|---|---|
| Transparent background | PNG | PNG supports transparency and is widely accepted by design tools. |
| Website image on a solid background | WebP or JPG | Flattening the background can make the file much smaller. |
| Online store product master | PNG master plus WebP/JPG copies | Keep an editable transparent file and publish lighter copies. |
| Email or document use | PNG or JPG | Use PNG for transparency; use JPG if the recipient only needs a normal image. |
Examples: portrait, product, and lifestyle images
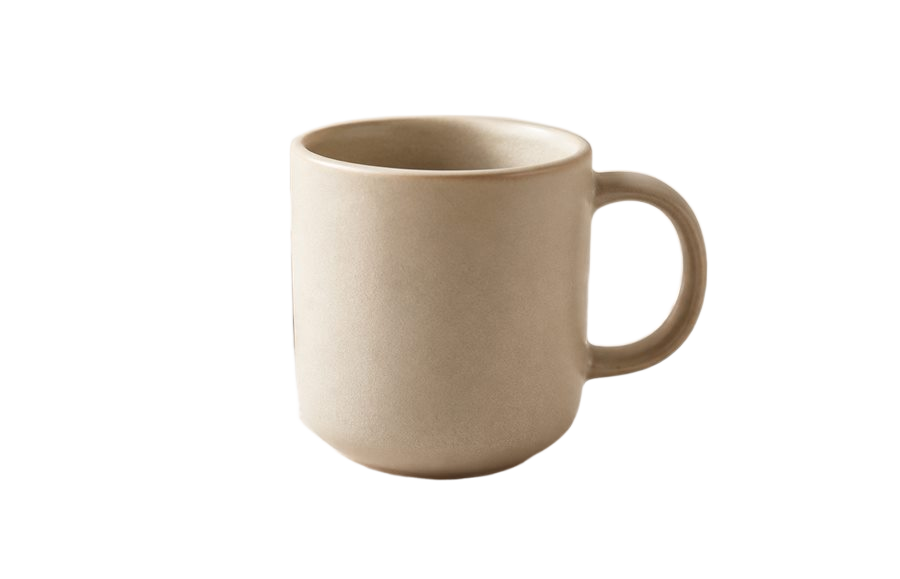
Different subjects fail in different ways. A portrait often needs hair refinement. A cup or product image needs accurate holes and handle edges. A lifestyle image may need a balance between clean removal and natural-looking shadows.
 Before
 After
After
Final checklist before publishing or sending
- The subject is complete and no important parts were removed.
- There is no obvious old-background halo around the edge.
- Hair, handles, small holes, and transparent parts look acceptable at normal viewing size.
- The image still looks clean on the actual background where it will be used.
- The final file size is reasonable for the page, email, marketplace, or document.
- You kept the original image and a transparent PNG master for future edits.
FAQ
What images work best for background removal?
Sharp images with a clear subject, good lighting, and visible contrast between subject and background usually work best. If possible, avoid low-resolution screenshots and heavily compressed images.
Should I use PNG after removing a background?
Use PNG when you need transparency. If the final image does not need transparency, a flattened JPG or WebP copy can be smaller and faster for web pages.
Why does the background remover miss small details?
Small details can be hard to separate when they share similar colors with the background, are out of focus, or have shadows and reflections. That is why edge review and manual restore tools are useful.
Can I remove backgrounds for product photos in bulk?
Yes, but test one or two images first. Use similar lighting, angles, and backgrounds across the batch so the results stay consistent.